HOW TO MAKE A WIRE STAR:
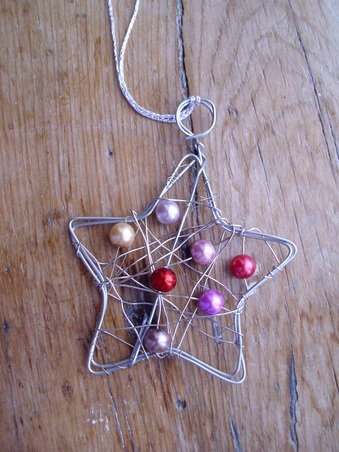
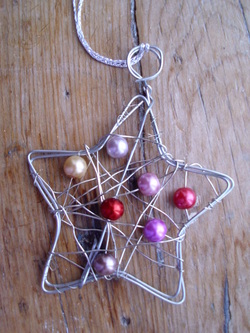
This is my first ham-fisted effort, so be kind! I’d seen an amazing bead encrusted star on Pinterest. It’s a stunner, and set me wondering how easy it’d be to try something along those lines.
That’s the thing about simple things. They’re deceptive. You think ‘ah, I can knock one of those out in no time’ but ha! By trying new skills ourselves we learn to value the skilled crafters out there, their mastery of their craft and the subsequent price they put on their creations.
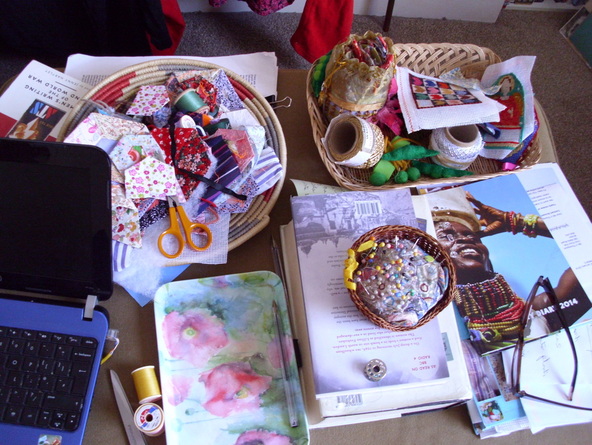
If you want to try a wire star for yourself, you’ll need some basic odds & ends:
MATERIALS:
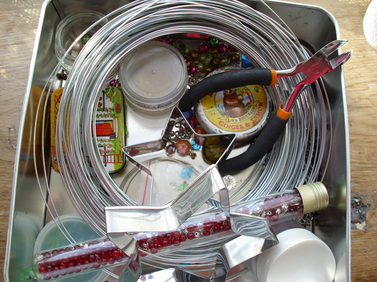
WIRE: two types of wire, one thicker for the star, the other thinner for decoration. I tried looking in DIY aisles at various stores, then found the thicker wire in a garden centre. It was £2.29 for a reel of 1 diameter galvanised wire 30m.
I had the thin wire left over from jewellery making efforts some years ago.
WIRE CUTTERS: I used a small pair of cutting pliers, originally bought as part of a beginner’s jewellery making kit on ebay. You could raid your / your partner’s tool kit for wire cutters, or you’re bound to know a friend who dabbles in jewellery making and could lend you some.
TIP: don’t be tempted to use your decent sewing scissors. You’ll ruin them.
STAR SHAPED BISCUIT (COOKIE) CUTTER: you can make do without one, but it’s fiddly.
Various BEADS and a small amount of metallic THREAD or RIBBON
This is my first ham-fisted effort, so be kind! I’d seen an amazing bead encrusted star on Pinterest. It’s a stunner, and set me wondering how easy it’d be to try something along those lines.
That’s the thing about simple things. They’re deceptive. You think ‘ah, I can knock one of those out in no time’ but ha! By trying new skills ourselves we learn to value the skilled crafters out there, their mastery of their craft and the subsequent price they put on their creations.
If you want to try a wire star for yourself, you’ll need some basic odds & ends:
MATERIALS:
WIRE: two types of wire, one thicker for the star, the other thinner for decoration. I tried looking in DIY aisles at various stores, then found the thicker wire in a garden centre. It was £2.29 for a reel of 1 diameter galvanised wire 30m.
I had the thin wire left over from jewellery making efforts some years ago.
WIRE CUTTERS: I used a small pair of cutting pliers, originally bought as part of a beginner’s jewellery making kit on ebay. You could raid your / your partner’s tool kit for wire cutters, or you’re bound to know a friend who dabbles in jewellery making and could lend you some.
TIP: don’t be tempted to use your decent sewing scissors. You’ll ruin them.
STAR SHAPED BISCUIT (COOKIE) CUTTER: you can make do without one, but it’s fiddly.
Various BEADS and a small amount of metallic THREAD or RIBBON
HOW TO ASSEMBLE YOUR WIRE STAR:
Leaving an inch or so as a tail, wind the end of your thicker wire around a chunky pen or crayon twice. That makes a nice circular loop.
Then wind the wire around the outer edge of the biscuit cutter. It’s tricky at first, but keep trying. (If that description doesn’t make sense – imagine wrapping thread around a cotton reel. You’re winding the wire around the biscuit cutter in the same way. Does that help?)
To make my star sturdy I wound the wire around the biscuit cutter twice before chopping off the end and tucking it inside the star where, in theory, it’d be lost among the thinner wire and beads.
Once your star’s made you thread beads on to the thinner wire before wrapping it around.
I haven’t decorated this star much as I had very little thin wire to hand. But you could use much more, and lots more beads too. Tiny seed beads or glinting glass ones. Multi coloured beads or all silver. Pearls or glittery ones.
TIP: Charity shops are great for costume jewellery at knock down prices. Necklaces and bracelets can be broken up and beads re-used on projects like this.
Once you’re done, hang your star from your (sometime soon) Christmas tree or hang by a window where it’ll catch the light. Now, I’m off to source some more thin wire and have another crack at this. Maybe version two will be better? We’ll see.